Wednesday, February 28, 2018

DARK HOLE


***CT for Designz by Sue***

Exclusive kit for The Hunter tube. You can use this kit with any tube. Beautiful kit with lots amazing elements for all your Mermaid or Summer creations - PTU kit - "Dark Hole". You can use any tube with this kit. You cannot share in part or whole with anyone for any reason

You can purchase the kit here:
https://store.arthurcrowesfactory.com/index.php?route=product/product&product_id=3914&search=dark+hole

CLOVER FAIRY


In this tutorial I used


Used the beautiful kit from Rieneke Designs - PTU kit called Clover Fairy - You can purchase the kit here – 


 I used Alehandra Vanhek tube- you can purchase her/his tubes here - You need a license to use her/his tubes  - 


I used PSP 9 but any version should work

Font I used – Celtric Garamond the 2nd

Mask – Of your choice

Drop Shadow I used – 0 2 25 8

Open a new transparent canvas 700 by 600 and fill with white

Add your drop shadow as you go along 


Paper 2 – Flip - Add mask - Delete mask - Merge Group

Element 18 - resize to 75 - Duplicate - Place in position 

Paper 2 – Place under Element 18 – Expand by 10

Tube – I resized mine to 45 – Place behind the top Element 18

Erase – Tube under Element 18 (See mine as a reference)
Erase – Top (Element 18) – That’s over the tube – (See mine as a reference)

Element 25 - resize to 30 - Place in position

Element 11 - resize to 25 - Mirror - Place in position 

Element 1 - resize to 55 - Place in position 

Element 16 - resize to 40 - Mirror - Place in position

Element 31 - Place in position 

Element 36 - resize to 25 - Place in position

Element 12 - resize to 30 - Place in position

Element 27 - resize to 50 - Place in position

Element 60 – Duplicate – Mirror - Erase the flowers you don’t want in your creations (See mine as a reference) – Merge down - Place in position

Element 3 – resize to 25 – Place in position

Element 13 – resize to 25 – Place in position

Element 24 – resize to 80 – Erase any butterflies you don’t want in your creations (See mine as a reference) – Place in position


Add any other elements you would like

Merge Visable

Resize your tag 

Add Copyright information

Add name

Thank you for trying my tutorial

Monday, February 26, 2018

MY PIRATE


In this tutorial I used


Used the beautiful kit from Lil Mz’s Brainstorm - PTU kit called - You can purchase the kit here – 


 I used Arthur Crowe tube- you can purchase her/his tubes here - You need a license to use her/his tubes  - 


I used PSP 9 but any version should work

Font I used – Pirates Bay

Mask – Of your choice

Drop Shadow I used – 0 2 25 8

Open a new transparent canvas 700 by 600 and fill with white

Add your drop shadow as you go along 


Paper 8 - Add mask - Delete mask - Merge Group

Element 55 - resize to 80 - Place in position 

Paper 14 – Place behind Element 55 – Expand by 10

Element 40 – Place behind Element 55 – Expand by 10 – Duplicate – Merge down

Tube – I resized mine to 60 – Place in position

Element 63 - resize to 50 - Place in position

Element 42 - resize to 40 - Place in position 

Element 19 - resize to 40 - Place in position 

Element 1 - resize to 60 - Place in position

Element 7 - resize to 60 - Place in position 

Element 87 - resize to 40 - Place in position

Element 32 - resize to 30 - Place in position

Element 24 - resize to 50 - Place in position

Element 91 - resize to 50 - Place in position

Element 11 – resize to 11 – Place in position

Element 16 – resize to 20 – Mirror – Place in position

Element 21 – resize to 17 – Mirror – Place in position

Element 62 – resize to 10 – Place in position

Element 94 – resize to 20 – Place in position

Element 72 – resize to 30 – Place in position

Element 88 – resize to 15 – Place in position


Add any other elements you would like

Merge Visable

Resize your tag 

Add Copyright information

Add name

Thank you for trying my tutorial


EMILY DOLL


In this tutorial I used


Used the beautiful kit from Bibi’s Collection - PTU kit called Emily Doll - You can purchase the kit here – 


 I used Janah Irinya tube- you can purchase her/his tubes here - You need a license to use her/his tubes  - 


I used PSP 9 but any version should work

Font I used – Arabella

Drop Shadow I used – 0 2 25 8

Open a new transparent canvas 700 by 600 and fill with white

Add your drop shadow as you go along 


Element 78 - resize to 50 - Place in position 

Element 102 - resize to 52 - Place in position

Paper 9 – Place under Element 102 – Expand by 10

Element 100 – resize to 40 – Place under Element 102 – Expand by 10

Element 96 - resize to 50 - Place in position 

Element 32 - resize to 20 - Mirror - Place in position 

Element 30 - resize to 25 - Place in position

Element 27 - resize to 40 - Place in position 

Element 29 - resize to 35 - Place in position

Element 88 - resize to 30 - Place in position

Element 45 - resize to 18 - Place in position

Element 7 - resize to 22 - Place in position

Element 82 – resize to 17 – Place in position

Element 111 – resize to 40 – Place in position

Element 97 – resize to 50 – Place in position – Erase string


Add any other elements you would like

Merge Visable

Resize your tag 

Add Copyright information

Add name

Thank you for trying my tutorial


Sunday, February 25, 2018

SURF N TURF


In this tutorial I used


Used the beautiful kit from Freeks Creations - PTU kit called Surf N Turf - You can purchase the kit here – 


 I used Very Many tube- you can purchase her/his tubes here - You need a license to use her/his tubes  - 


I used PSP 9 but any version should work

Font I used – Monkey Snake

Mask – Of your choice

Drop Shadow I used – 0 2 25 8

Open a new transparent canvas 700 by 600 and fill with white

Add your drop shadow as you go along 


Paper of Choice (I used a picture I took) - Add mask - Delete mask - Merge Group

Frame - resize to 95 - Place in position 

Paper of Choice (I used a picture I took) – Place under the Frame – Expand by 10

Tube – I resized mine to 42 – Place in position

 Surf Board - resize to 80 - Place in position

 Ball - resize to 20 - Place in position 

  Pail - resize to 30 - Place in position 

  Sand Castle - resize to 45 - Mirror - Place in position

 Bag - resize to 30 - Place in position 

 Drink 2 - resize to 30 - Place in position

Sand 2 - Place in position

  Starfish 2 - resize to 35 - Place in position

  Sun - resize to 50 – Opacity at 80 - Place in position

Bubbles – resize to 60 – Duplicate – Mirror – Place in position

Fish 3 – resize to 15 – Mirror – Place in position

Fish – resize to 15 – Mirror – Place in position


Add any other elements you would like

Merge Visable

Resize your tag 

Add Copyright information

Add name

Thank you for trying my tutorial


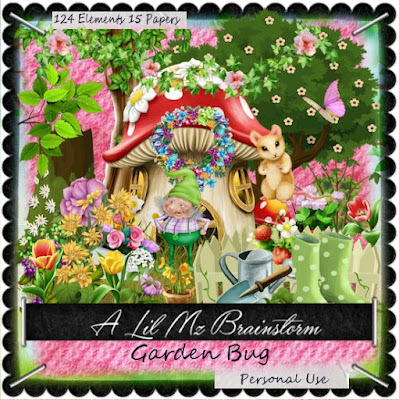
GARDEN BUG


In this tutorial I used


Used the beautiful kit from Lil Mz’s Brainstorm - PTU kit called Garden Bug - You can purchase the kit here – 


 I used Alexhandra Vanhek tube- you can purchase her/his tubes here - You need a license to use her/his tubes  - 


I used PSP 9 but any version should work

Font I used – S’orieno

Mask – Of your choice

Drop Shadow I used – 0 2 25 8

Open a new transparent canvas 700 by 600 and fill with white

Add your drop shadow as you go along 


Paper 11 - Add mask - Delete mask - Merge Group

Element 39 - resize to 80 - Place in position 

Paper 13 – Place behind Element 39 – Expand by 10

Tube – I resized mine to 35 – Mirror – Place in position

Element 32 - resize to 35 - Mirror - Place in position

Element 83 - resize to 50 - Place in position 

Element 2 - resize to 40 - Place in position 

Element 85 - resize to 45 - Place in position

Element 72 - resize to 27 - Place in position 

Element 120 - resize to 50 - Place in position

Element 24 - resize to 25 - Place in position

Element 23 - resize to 10 - Place in position

Element 48 - resize to 20 - Place in position

Element 7 – resize to 20 – Place in position

Element 6 – resize to 20 – Place in position

Element 29 – resize to 15 – Place in position

Element 56 – resize to 15 – Place in position

Element 65 – resize to 15 – Place in position

Element 20 – resize to 20 – Place in position


Add any other elements you would like

Merge Visable

Resize your tag 

Add Copyright information

Add name

Thank you for trying my tutorial


Tuesday, February 20, 2018

EGGCELLENT EASTER - BANNER AND AVATAR


In this tutorial I used


Used the beautiful kit from Daelman’s Designs - PTU kit called - You can purchase the kit here – 


I used PSP 9 but any version should work

Font I used – S’orieno

Mask – Of your choice

Drop Shadow I used – 0 2 25 8

Banner – 851 x 351

Add your drop shadow as you go along 


Paper 7 – Opacity 80

Element 030 - resize to 95 - Place in position 

Element 031 - resize to 97 - Place in position

Element 081 - resize to 60 – Duplicate - Mirror - Place in position 

Element 096 - resize to 80 - Place in position 

Element 026 - resize to 60 - Place in position

Element 08 - resize to 20 - Place in position 

Element 036 - resize to 15 – Duplicate 4 times – Mirror 2 and 4 - Place in position

Element 039 – resize to 15 – Place in position

Element 037 – resize to 15 – Place in position

Element 038 – resize to 15 – Place in position

Merge down Element 036 to 038 – Duplicate – Mirror – Place in position

Element 041 - resize to 20 – Duplicate - Mirror - Place in position

Element 016 - resize to 60 - Place in position

Element 09 - resize to 25 - Place in position

Element 058 – resize to 25 – Place in position

Element 085 – Place in position

Element 01- resize to 30 – Place in position

Element 027 – resize to 40 – Place in position

Element 074 – resize to 60 – Duplicate – Mirror – Place in position

Element 0118  - Duplicate – Mirror – Place in position


Add any other elements you would like


CTL D

Merge Visable – Add 5 inch border


AVATAR

200 x 200

Take your copy – Position (See mine as a reference)

Merge Visable – Add 5 inch border

Add Copyright information

Add name

Thank you for trying my tutorial